Showing posts with label Mod Podge. Show all posts

Thursday, December 1, 2011

Naughty or Nice Door Hanger


This idea I got from kmckaydesigns she had the template you can print off with the Santa I just got a wood door hanger, some Christmas scrap paper, and a brad so the arrow could move and went to town with my friend good old mod podge. Check out her page she has some awesome ideas I love her stuff!!

Check out the link parties I participate in HERE

Saturday, October 15, 2011

Mod Podge Pumpkins


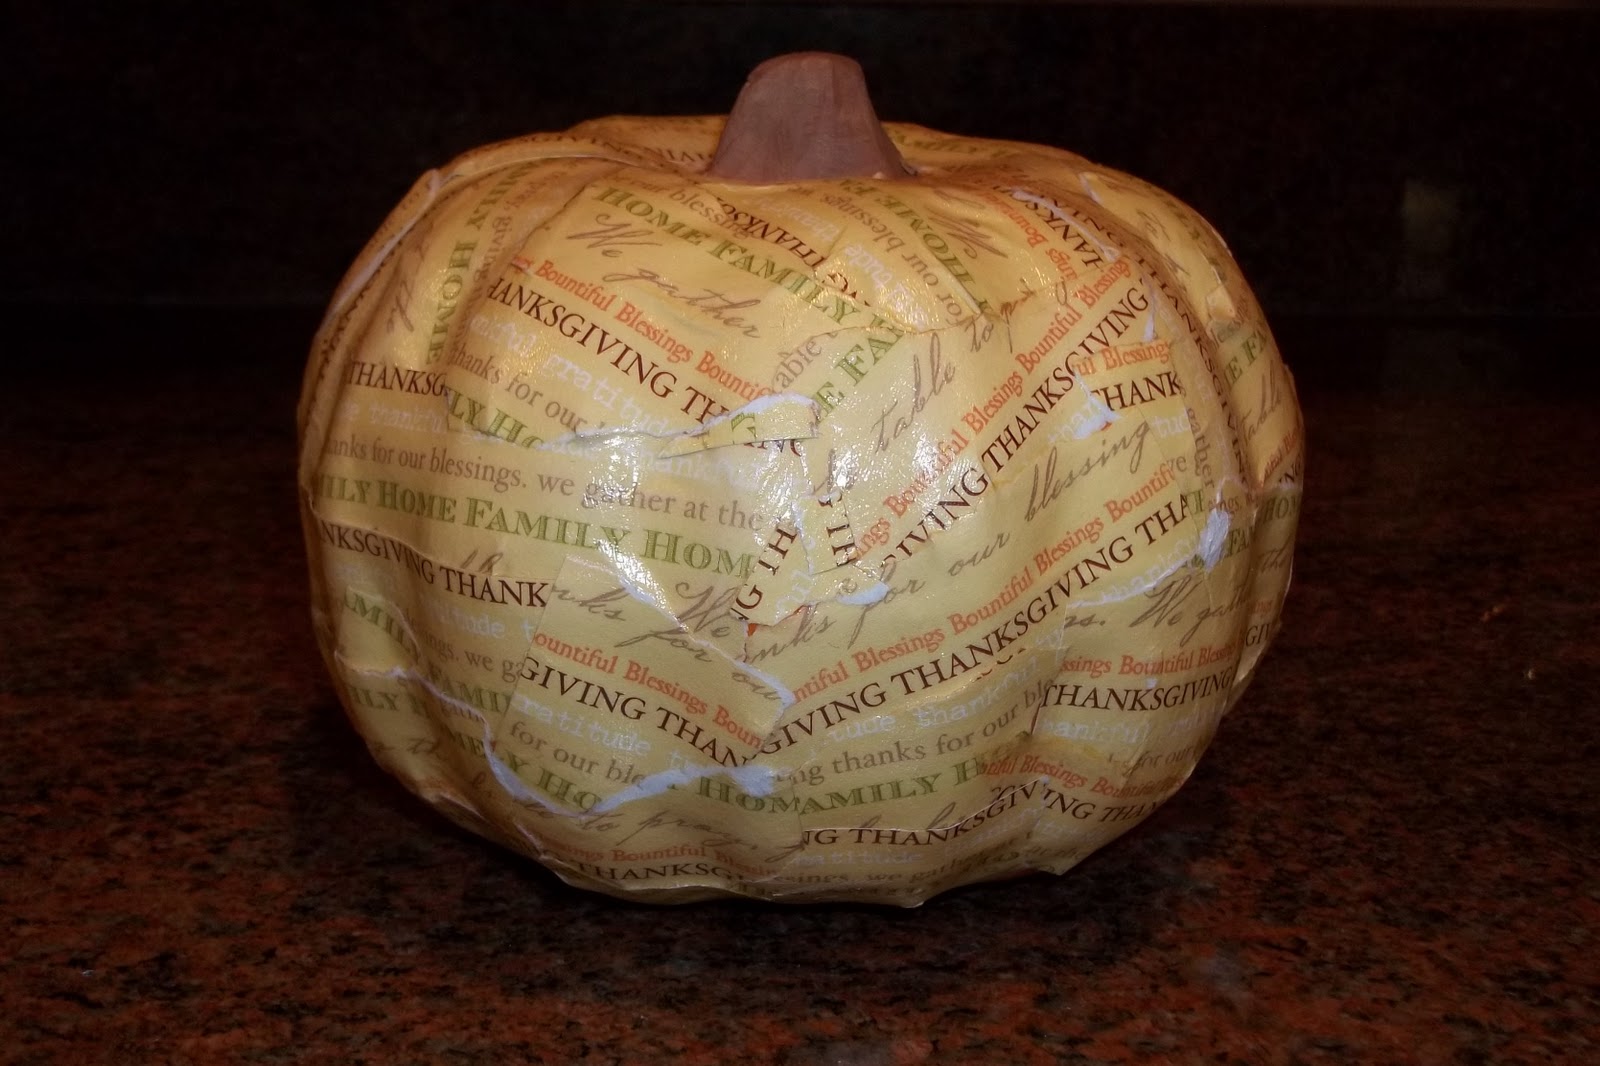
I found this idea Here and had to try it, I don't have a lot of fall decorations so I thought this would be a perfect addition, I only made one to start with cause I wasn't sure how it would turn out but I plan on making another one.
I got the pumpkin at the Dollar Tree and I had the thanksgiving paper in my scrapbooking supplies. All you have to do is rip the paper into pieces and mod podge them on to the pumpkin make sure you use plenty of coats of mod podge. Then let dry and you have a fun fall/thanksgiving decoration.

Check out the link parties I participate in HERE

Monday, July 25, 2011

Paint Chip Art


I have seen ideas like this around blog land but lifecraftsandwhatever has a tutorial Here and so I was inspired by hers to make my own. (I need to put something on both sides of the picture thinking some candle sconce things.) This is made out of paint chip samples. I actually took a piece of my curtain along with me to Home Depot so I could match the colors to my living room. First I cut all the samples down to 3x3, then laid them out randomly to my liking. (I had to make mine 36x36 to have it centered and also cover an outlet from our TV that used to be mounted on the wall.)
I then cut a piece of plywood that we had in the garage to 36x36. I started using spray adhesive but found that to be to much of a pain so I switched to mod podge. First I painted a layer of mod podge in small sections (about 3-4 squares at a time) laid the squares tight to each other then brushed a light coat of mod podge on top, I used a small plastic scrapper and rubbed the mod podge around to give it a different textured look. 
I let that dry over night,
 then I used some dark stain my mom had and painted a heavy coat,wiped off and let dry. I did this about 3 times (until I got the aged look I wanted)
As for the edges (frame) I just hot glues some gross grain ribbon that I happened to find at the dollar store in a solid dark purple that matched perfect. I'm not sure if I am going to make a frame for it or not maybe down the road, as I have said before I have little patience for long projects and I am ready to get this on the wall in my living room!
All together this project only cost me a dollar! Gotta love that!
(paint chips - free / plywood, hot glue, stain, and mod podge - on hand / ribbon - dollar
This is by far the largest project I have ever attempted.)
Check out the link parties I participate in HERE

Monday, June 20, 2011

Play Make-up

This was not my original idea I say it in blog land but can't remember where for the life of me (if you know please let me know so I can give credit where it is due)
My daughter loves to play with make-up so I made her, her own. All you need is some Dollar Tree blush, eyeshadow, compact and some dimensional magic. (By mod podge or diamond glaze) Just put a thin layer of the glaze on top of the powder.
Pop any bubbles with a pin.
 (check on it frequently as new bubbles will appear and you want to pop them before it sets which happened to me).
Let dry over night and there you have it pretend make-up without the mess.
This would make a cute little girls gift.
Check out the link parties I participate in HERE

Saturday, June 18, 2011

Candy Fishing Bait Gift Box

These are the gifts my daughter and I made for Fathers day.
Dad's gift was of course the fishing box
I started off by spray painting the lids hunter green, then I printed the labels that I found on k mckay designs. (I love her ideas/printables!) on some green design scrapbook paper, We then mod podged the labels on the front and top of the jars and lids.
We filled the baby food jars with some Swedish fish, gummy worms and some other of dad's favorite candies. I found a set of 3 wood boxes at walmart for 6.00, I used the one that fit the jars best and painted it brown. Then mod podged the label on the front. (I did tie a small fishing weight to 2 of the jars with some twine to add a little more decoration, I also added some brown shredded filler to the bottom of the box).
Here is a close up of the jars  


Check out the link parties I participate in HERE

Friday, March 18, 2011

Spring Egg Bowl

 I found this bowl at Goodwill for .99, it was and ugly brown, so I sprayed it silver (as you can see that is a color spray paint I have on hand a lot, cause I love it) then I added some pink ribbon that I had on hand. The butterfly stickers where from the Dollar Tree (a mix bag of spring foam shapes)
The eggs inside where originally the brown cardboard kind from Jo Ann's .69 each I mod podged some tissue paper on them. Then the Pink one I added some of my foam flowers (same pack as the above butterflies), and the yellow I just tied a bow around. I am debating if I want to recover the poke a dot one cause it doesn't really match the rest, What do you guys think? I have some more foam stickers with tulip or butterfly shapes I could put on the other one if I did a solid color.

Monday, March 7, 2011

Birthday Countdown Blocks

I have seen these all over blog land so I'm not sure who to really give credit to. :(
I cut out 2- 4x4 blocks and 1-8.5x2x4 block, Sanded and painted colors to match my birthday paper I had on hand in my scrapbook stuff. I then cut out squares of the paper just a little smaller then each side of the 4x4 blocks, and mod podged them on. I used my cricut and cut out numbers for each block-
First Block -0,1,2,6 or 9,7,8
Second Block -0,1,2,3,4,5
glued them on and mod podged over to protect them (They will be handled a lot). I added some chalk board paint to the front of the 2x4 so we can write the name of the person who is having the birthday.
check out the link parties I participate in HERE
Wednesday, February 23, 2011

St. Patrick's Day Entry Table


My Tatorial for the Mini Topiary  Here
My Tatorial for the Pot of Gold Here
My Tatorial for the Lucky Clover Plate Here
and last but not least I found this cute Subway art Here

Check out the link parties I participate in HERE

Lucky Clover Plate

I happened to find this candle plate at goodwill for a $1.00 and knew exactly what I was going to do with it.
I do not have vinyl but I have a cricut and a sticker maker. If you are worried about it coming off you could put a thin layer of mod podge over it also.
Check out the link parties I participate in HERE

Saturday, February 5, 2011

Wood Easter Eggs

I had my grandpa cut out some egg shapes from some scrap wood for me. I then painted them some fun colors that would match my Easter paper I had on hand.  Then I mod podged some Easter paper on (the pink one I did mod podge paper to it so the texture wasn't different) I added some ribbon and a flower looking button, layered and glued then together with some wood glue and tied some sheer ribbon around the whole thing. (I did add some gray ink to the edges, front and sides but I'm not sure i like it as much as the brown antique ink)
Check out the link parties I participate in HERE

2x4 St Patrick's Day Blocks

Here is my other 2x4 version like the one from "How Does She". I did it the same as I did the Valentine blocks. I painted the wood blocks and mod podged some cute scrap paper on them. I also used a magnetic thumb tack that I had on hand so I could update it year to year.
Check out the link parties I participate in HERE

2x4 Sweetheart Blocks

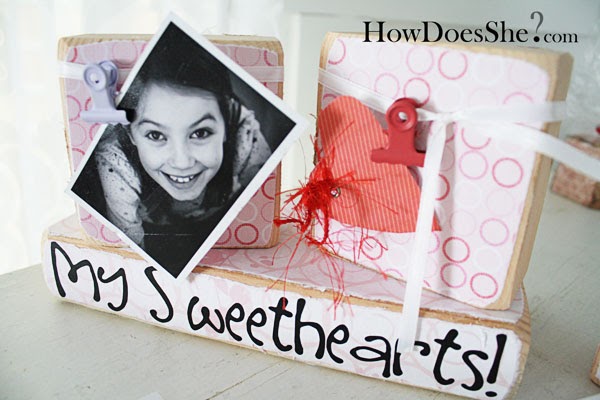
If you remember I posted a link for some 2x4 ideas from "How Does She" well here is my version of one of my favorites. Of course I had to do it a little different I painted the wood blocks and mod podged some cute scrap paper on them. I also used some magnetic thumb tacks that I had on hand so I could update them year to year. This one I might just put on a shelf in my daughters room year round because I like it so much.


Check out the link parties I participate in HERE

Saturday, January 22, 2011

How Does She?


I absolutely love this site I just found She has a lot of cool ideas for 2x4's. I am definitely going to be making some of this! Check her site out HERE

Tuesday, January 4, 2011

LOVE Blocks

I made a bunch of different holiday words all at one time but this is my Valentine blocks. (A 2x4 cut into 4x4 and 5x4 blocks) I painted them red and pink, mod podged some valentine scrap paper on them, cut out my letters with my cricut and added a few of my 3D stickers I had on hand.

Christmas gift ideas

These are some of the Christmas gifts I made this year or plan on making for next years gifts.
CANDY DISH- I did see these on someones blog but I am not sure who it was and now of course when I want to give credit I can't find it again, if you know please post a comment so I can give credit where it is due! Dollar store candy dish and a taper holder glued with some E6000 glue to give it some height.

SANTA'S MAGIC KEY -  I did make a couple of these this year and I got some more ornaments on clearance so I could make some for next year also. I found this idea on kmckaydesigns she has a template you can print out I didn't want to go with the vintage look since I had the sparkly red, gold and silver keys so I made my own tag from some clip art I found and printed with her saying on the back and attached it to the key with some Christmas ribbon. 
CHRISTMAS PLATTERS - I found these salad plates on clearance at Walmart for $1.50 so I snagged up a few with plans for some goody plates for next Christmas. I plan on spray painting some taper holders either the red or cream color, attaching them to the bottom center with some E6000 glue and filling the plates with some of my Christmas candy I make.

CANDY DISH - I made this for my mother-in-law who loves to spoil my daughter with candy. I attached a taper holder to a glass bowl with some E6000 glue. I found some stickers that looked like candy, added a saying and mod podged over it so it wouldn't come off with washing it.

Joy Blocks

 
 I painted the blocks red and green, mod podge some Christmas paper on, used my cricuit to cut the word JOY, added some embellishments and inked to give a distressed look.

Sunday, October 31, 2010

Soap Pump

I made and posted a Halloween version of this already but it was so easy I made a few more here is another one
Materials:
any soap bottle
 spray paint of choice (I used a brown hammered look)
graphic of choice (sticker or die cut)
mod podge

Directions:
1. Empty soap into a temporary container and rinse out
2. Spray paint bottle and if needed paint pump asm.
3. When dry attach graphic with mod podge only applied mod podge on and around the edges of the graphic. (If you use a vinyl sticker you don't need mod podge)
4. Refill with soap and you are ready to use.
You could easily personalize this for a housewarming gift.

Saturday, October 30, 2010

Halloween Soap Pump

This is my last Halloween related blog for this year.
It was so simple and cheap - of course ;)  
Materials:
any soap bottle
black spray paint 
graphic of choice (sticker or die cut)
mod podge

Directions:
1. Empty soap into a temporary container and rinse out
2. Spray paint bottle and if needed paint pump asm. (here I wanted it purple so I just set it aside)
3. When dry attach graphic with mod podge if you use a vinyl sticker you don't need mod podge only applied mod podge on and around the edges of the graphic (I did the whole front and when it got wet you could see the mod podge)
4. Refill with soap and you are ready to use.

Friday, October 29, 2010

Spell Books w/ Wizard Wand


Spell Books
This idea I also got from kmckaydesigns she has some really cool inexpensive projects. 
(I like her book better)
 The labels for the books are here http://www.kmckaydesigns.com/wp-content/uploads/2009/10/SpookyBookLabelsFinal_edited-1.pdf
Wizard Wand
(I though this would look cool with the books on my table - my daughter is into that Wizards of Waverly place Disney show so the first thing I thought of when I saw these books was a wand!)
 Stick
 tissue paper
 mod podge
 brown paint
 hot glue gun
gold paint

1. coat stick in sections with mod podge and apply tissue paper, let dry and apply top coat of mod podge over entire stick, let dry.
2. spray paint stick, let dry.
3. take glue gun and apply glue in a swirl pattern around "wand" handle and where ever you want a little embellishment, let dry.
3. paint over hot glue only with gold paint or marker, let dry.
if you can tell I am emphasizing the LET DRY because I usually don't have the patents to let stuff dry :)


Tuesday, October 26, 2010

Halloween Luminaries

 Jar Luminaries
this is the one that my 3 year old and I made 

but check out how to make all these other cool ones Here.
(Another way I have seen this is spray painting the jar and adding eyes and mouth with blach electric tape or card stock.)

I haven't made these yet but I definitely will soon!
Now this idea I found Here. She started with some Cylinder vases from dollar tree. Used mod-podge and white tissue paper. Then she used her cricut to cut out some spooky images out of black card stock. sooooo easy!